Real Estate Drone Photography for Developers: The Shots That Sell a Project
By Kush Agarwal, President and CEO, YelloSKYE. Published .
Executive Summary
- The Question: Which aerial shots actually help a developer sell a project, and when and how should they be captured?
- The Answer: Buyers of new property want proof of four things: the location, the view, the amenities and that the project is moving. Each needs its own shot, taken at the right stage of the project, planned around light and repeatable positions, and then cut to fit every channel the sales team uses.
- The YelloSKYE Angle: Studio IQ produces aerial stills, view-from-floor panoramas and composites from the same reality capture that records construction, so marketing gets fresh, accurate images at every stage without separate shoots.
Real estate drone photography, for a developer, is the planned use of aerial images to answer the questions buyers ask before they commit to a unit: where is it, what will I see, what do I get, and is it really being built? A good set of drone photographs answers all four with real evidence rather than renders alone, and it does so from the land purchase through to the final handover.
This guide is written for developers, sales directors and marketing teams rather than agents listing a single house. It covers the shots that move buyers, when in the project each one should be taken, how to plan a shoot and how the images get used across sales channels. At YelloSKYE, this work is handled by Studio IQ, the part of our offer that covers media and marketing. For moving footage, launch films and progress films, see our companion guide to construction marketing video.
Why developers need a different kind of aerial photography
A resale listing photographs something that exists. A developer is usually selling something that does not exist yet, or exists only as a frame of concrete behind a hoarding. That changes what the photographs must do.
Most buyers of new property hesitate over the same short list of doubts. Is the location as good as the brochure claims? Will my unit's outlook be open or blocked? Will the promised amenities really be there? Will the project be finished on time? Every aerial image in the sales kit should address one of those doubts. An image that only looks attractive, without answering anything, is decoration.
A second difference is time. A house is photographed once. A development is photographed over two or three years, and the marketing needs change as it moves from land to launch to completion. Planning the photography as a series, rather than as one shoot, is what separates a coherent campaign from a folder of unrelated pictures.
The shots that sell a development
The table below maps each type of aerial image to the buyer question it answers.
| Shot | Buyer question it answers | Best captured | Main uses |
|---|---|---|---|
| Location context | What is around the site, and how far is it to the things I care about? | Before launch, refreshed if the area changes | Brochure, website, listing portals, location map |
| View from floor | What will I see from my unit? | Before or during foundations | Sales gallery, unit pricing, floor picker |
| Site and plot overview | How big is the project and where is my plot or tower? | At launch and at each phase release | Master plan pages, plotted sales, broker kits |
| Amenities and landscape | Are the pool, clubhouse and gardens real? | Once built; composites before that | Brochure, social, show-suite screens |
| Progress | Is it actually being built? | Monthly or at milestones, from fixed positions | Buyer updates, investor reports, social |
| Finished hero | What does the completed project look like at its best? | After landscaping is complete | Website hero, awards, resale and leasing |
Location context
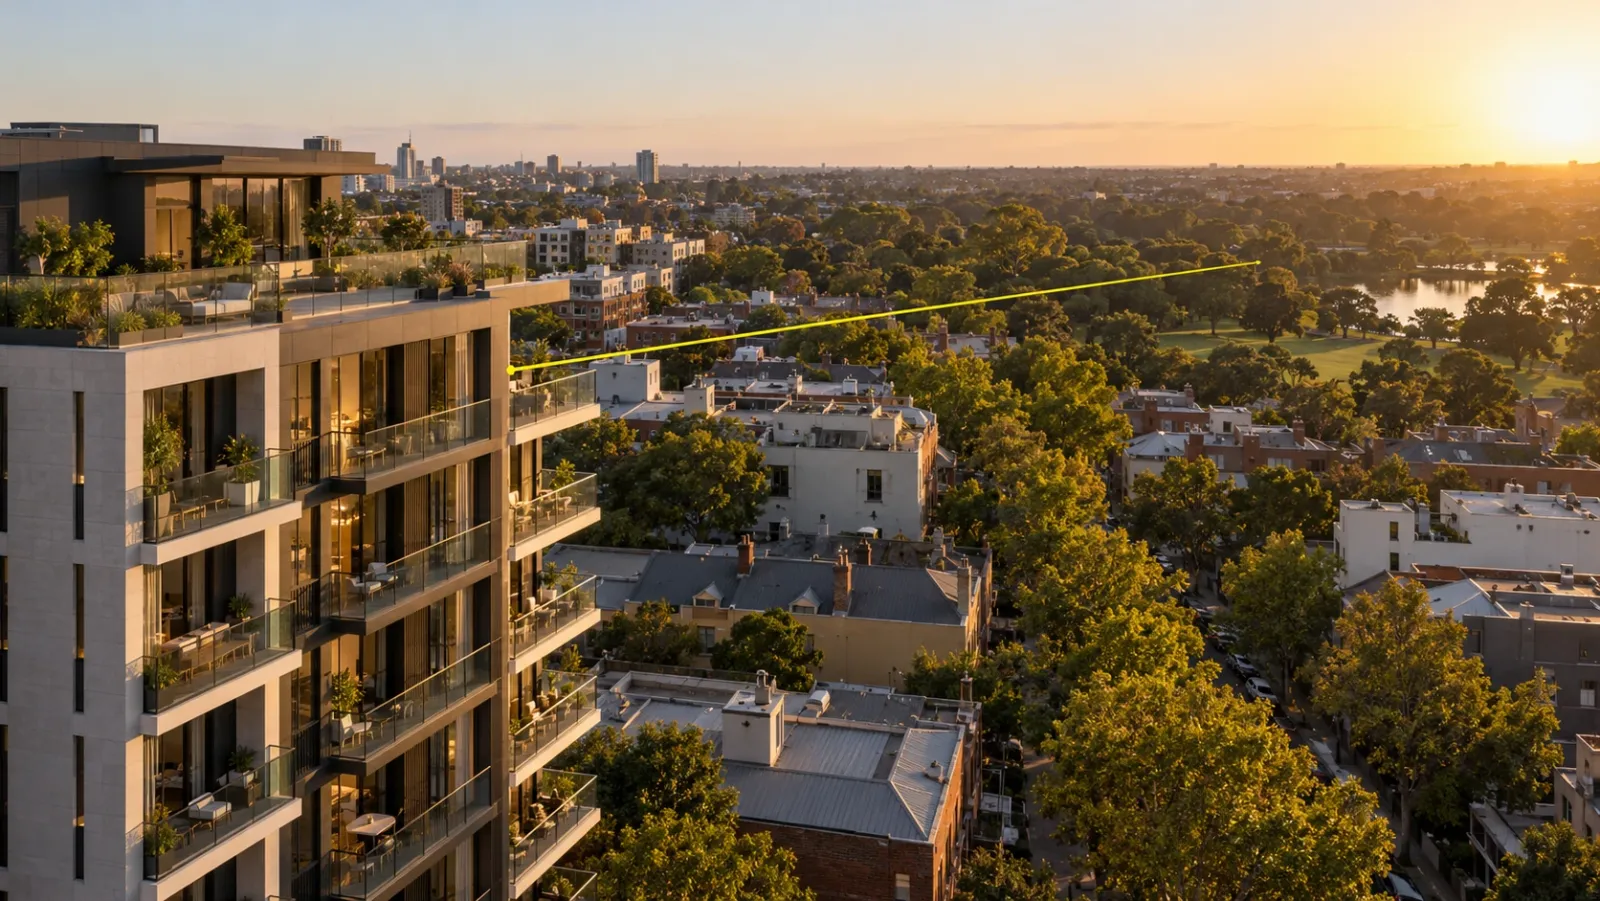
The most persuasive location image is taken high enough to show the site and the places buyers value in the same frame: the station, the school, the waterfront, the business district, the park. Shoot it from the direction that puts the strongest neighbours in view, then add simple labels and distance markers in post-production. Keep a clean, unlabelled version too, because channel partners and portals often want to add their own graphics.
View from floor
For a tower, the outlook can account for a large part of what a buyer pays, and it is the one thing a render cannot prove. The answer is to photograph the real view from the real height. In our view-from-floor use case, the coordinates and altitude of each future balcony and window line were taken from the BIM model, and drones then hovered at those points to record 360° panoramas for the sales gallery and digital twin. The developer could then show buyers why one floor justified a higher price than the floor below it, and international buyers could check their view without travelling. That use case records conversions three times faster.
Capture these early. Once the structure rises, the open air at those heights is gone and the moment for this shot has passed.
Site and plot overview
On plotted developments and large master plans, buyers need to find themselves on the map. A straight-down or steep oblique image with plot boundaries, phase lines or tower outlines drawn on it does this better than any drawing. Studio IQ's plot inventory format goes a step further, linking an aerial view to live availability so buyers can select a plot and see whether it is still for sale.
Amenities and landscape
Amenities are usually completed last, so before they exist the honest options are composites: a render of the clubhouse placed accurately into real drone imagery of the site. Studio IQ's 3D superimpose work aligns renders with the real-world setting for exactly this purpose. Once the pool, gardens and play areas are finished, replace the composites with photographs as quickly as possible, and label every composite clearly as an artist's impression until then.
Progress
Off-plan buyers and investors are reassured by evidence of steady progress more than by any claim. Fly the same positions at the same height on a regular cadence, so each new image can be compared directly with the last. On projects already using drone monitoring, these images often exist anyway: in our aerial progress capture work, weekly flights produce high-resolution milestone imagery of the whole site alongside the measurable maps the project team uses.
Finished hero
The final set is taken when the building is complete, the landscaping has had time to settle and the site is clean. This is the image for the website header, award entries and any later resale or leasing campaign, so it is worth waiting for the right light.
When in the project to shoot
Each stage of a development has a different sales job, and the photography should follow it.
| Project stage | Sales job | Photography to plan |
|---|---|---|
| Land and pre-launch | Prove the location and the outlook | Location context, view-from-floor panoramas, site overview, composites of the finished scheme in its setting |
| Launch | Fill the sales gallery and campaign | Labelled location maps, floor-by-floor view previews, master plan overlays |
| Construction | Keep buyers and investors confident | Progress stills from fixed positions, milestone images such as topping out |
| Completion | Replace every render with reality | Amenities, landscape, twilight hero, finished-site overview |
| Leasing and resale | Support the next owners and tenants | Refreshed hero and location shots as the neighbourhood changes |
The pre-launch shoot matters most and is the easiest to miss. It is the only window for clean view-from-floor captures, and it gives the launch campaign real images instead of a brochure built entirely on renders. YelloSKYE's media work can combine drone footage of the site with architectural renders and CGI to produce sales and investor material before the first slab is poured.
Planning a real estate drone shoot
Start from the sales brief
Before any flight is booked, the marketing lead should list the units, buyer groups and questions the images must answer. A shoot planned around "get some aerials" returns attractive images that answer nothing in particular. A shoot planned around "show the river view from levels 10 to 20 and the walk to the station" returns images the sales team will use every day.
Choose the light
Low sun gives depth, texture and warmth; harsh midday light flattens buildings and landscape. Check the sun's path against the main facade: a west-facing building wants an evening shoot, an east-facing one a morning shoot. Twilight, when the sky still has colour and interior and street lights are on, suits hero images of finished buildings. Haze, smoke and low cloud can ruin distant location shots, so allow spare days in the plan.
Fix positions and heights
Record the coordinates, height and camera direction of every key shot. That makes progress images repeatable, lets view-from-floor captures match the design model, and means next year's refresh can be shot from exactly the same point. On a live construction site, agree the flight plan with the contractor so the drone stays clear of cranes and lifting operations.
Permissions, safety and privacy
Commercial drone work needs a certified operator and, depending on location, airspace permissions from the national aviation authority (the FAA in the US, the UK's CAA or the UAE's GCAA, for instance). Sites near airports, heliports or sensitive buildings may need extra approval and longer lead times. Avoid photographing into neighbours' windows and gardens, and blur or crop anything identifying people or private property.
Prepare the site
For launch and completion shoots, small things show up from the air: skips, parked cars, loose hoarding panels, a stack of pallets on the lawn. Walk the site the day before and clear what can be cleared. For progress shoots, leave the site as it is: an honest working site is part of the evidence.
Specify the deliverables
Agree the outputs before the shoot, not after:
- Full-resolution stills, plus crops for landscape, square and vertical formats.
- Labelled and unlabelled versions of location and master plan images.
- 360° panoramas for view-from-floor and tour use, with their capture positions recorded.
- Capture date and position for every image, kept in the file data or a shot log.
- Usage rights that cover all channels, including channel partners and paid advertising.
Using drone photography across sales channels
The same image rarely works unchanged everywhere. Plan the crops and versions each channel needs.
| Channel | What works best | Practical note |
|---|---|---|
| Brochure and print | Location context, finished hero, amenity images | Needs the highest resolution and colour checked for print |
| Website and listing portals | Hero image, location map, progress gallery | Lead with the strongest outlook; keep the progress gallery dated and current |
| Sales gallery and floor picker | View-from-floor panoramas, master plan overlays | Studio IQ's 360° floor picker shows views from several floors with day and night lighting |
| Social media | Progress images, before-and-after pairs, twilight shots | Vertical crops; a new image every month keeps the account alive |
| Paid advertising | One clear image per buyer question | Test location-led against view-led creative |
| Broker and partner kits | Labelled location maps, plot overviews | Give partners approved, branded versions so they do not make their own |
| Investor and lender reports | Dated progress images from fixed positions | Show this period next to the last from the same point |
For the moving image versions of these channels, including launch films and FPV flythroughs, see construction marketing video. For navigable tours of units and amenities, see our guide to virtual construction walkthroughs.
Keeping aerial marketing honest
Aerial images are persuasive, which is exactly why they need care. Buyers who later find a view was exaggerated, or a neighbouring building edited out, lose trust in everything else the developer told them.
- Label composites. Any image combining renders with photography should say so.
- Date progress images. An undated progress photo cannot reassure anyone.
- Do not edit out neighbours. If a building blocks part of the view from level eight, the level-eight panorama should show it.
- Use real heights. A view captured from the wrong height misleads the buyer, however beautiful it looks.
Real views from real positions are a selling point in their own right. They let the sales team answer the hardest question with evidence.
Getting more from capture you already have
Many developers already fly drones over their sites for progress monitoring, and those flights produce imagery the marketing team never sees. YelloSKYE's starting point is that reality capture serves two purposes: operational monitoring for the project team and visual content for buyers, investors and leadership. A fixed camera recording the build, as in our time-lapse monitoring work, gives a steady stream of milestone images from the same viewpoint, and the same drone missions that measure the site can capture marketing-grade stills on the same flight. That gives marketing fresh, dated material every month without booking a separate photographer.
Checklist for a developer's aerial photography plan
- List the buyer questions the images must answer, by unit type and buyer group.
- Book a pre-launch shoot for location context, site overview and view-from-floor panoramas before foundations begin.
- Record coordinates, height and direction for every key shot so it can be repeated.
- Set a regular progress cadence from fixed positions, with extra captures at milestones.
- Plan light: check the facade orientation and allow weather days.
- Confirm the operator's certification and any airspace permissions well ahead of the shoot.
- Agree crops, formats, labelled versions, dates and usage rights before flying.
- Label composites, date progress images and keep views true to the real height.
- Schedule the completion shoot for after landscaping, and replace every render with a photograph.
Frequently asked questions
What is real estate drone photography?
It is the use of camera drones to photograph a property or development from the air. For developers, the aim is less about pretty overhead pictures and more about answering buyer questions a ground photo cannot: where the project sits, what is nearby, how big the site is and what the view will be from a given floor.
When should a developer start drone photography on a new project?
Before construction starts. The cleared site, its surroundings and the real view from future floor heights can all be captured before the first foundation, and those images carry the launch campaign. After that, repeat the same shots through construction and finish with a full set once the building and landscaping are complete.
Can you photograph the view from a floor that has not been built yet?
Yes. Using the building's design model, the position and height of a future unit can be calculated, and a drone can hover at that exact point to capture the real view. Studio IQ does this to produce 360° view-from-floor panoramas for sales galleries, so buyers see their actual outlook rather than an estimate.
Do you need permission to fly a drone for property photography?
Usually, yes. Commercial drone flights are regulated by the national aviation authority, for example the FAA in the US, the CAA in the UK or the GCAA in the UAE, and rules cover pilot certification, airspace near airports and flying over people. Hire a certified operator who handles those permissions and respects neighbours' privacy.
What time of day is best for real estate drone photos?
Golden hour, shortly after sunrise or before sunset, gives warm light and long shadows that show the shape of buildings and landscape. Twilight shots, taken just after sunset with interior and street lights on, work well for hero images of finished buildings. Check which way the main facade faces before choosing morning or evening.